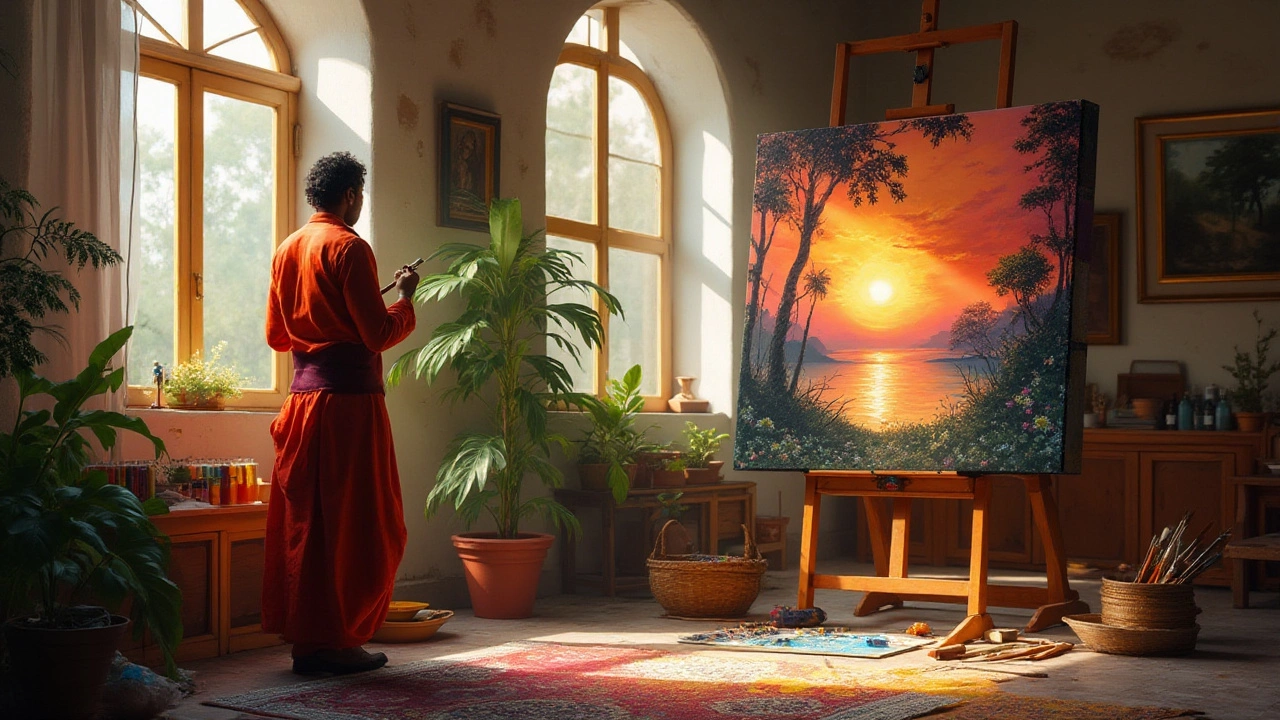
Diving into oil painting can feel like stepping into a world of rich textures and endless possibilities. But with great possibility comes great patience, especially when layering your colors. You might be tempted to quickly add on new layers to bring your masterpiece to life, but rushing in oil painting often leads to unwanted results. How long should you really wait between layers? The answer isn't as straightforward as a drying guide on the back of a paint tube.
The magic lies in understanding the properties of your materials and how they interact with your environment. Explore how varying factors like paint thickness and room temperature can turn your artistic journey into something akin to a science experiment, rather than a straightforward paint-by-numbers task. Unlock the secrets to perfect drying times and common pitfalls to avoid, making your creative process as smooth as your brushstrokes.
- The Science of Drying: Oils Explained
- Factors Influencing Layering Time
- Tip & Tricks for Faster Curing
- Common Mistakes to Avoid
- Creating Depth and Texture with Layers
The Science of Drying: Oils Explained
Oil painting, while an art form, often embodies characteristics of a science experiment. At its heart, the drying process is influenced by the very oils used to mix pigments. Linseed oil, one of the most commonly used mediums, undergoes a complex process called oxidation. As your paint dries, the oil reacts with oxygen in the air, causing the paint to harden over time. This is not the evaporation of moisture but a chemical transformation, turning the wet surface into a dry film.
Factors Affecting Drying Time
The drying rate is not uniform among all oils. Linseed oil is known for its relatively fast drying time compared to others such as walnut oil or poppyseed oil, which offer slower drying rates. These differences are crucial when planning your painting sessions. A painter using a walnut oil medium might need to add an extra day or two between layering to ensure the integrity of the work.
Influence of Pigments
Not just the oils, but the pigments affect drying times. Earth colors like burnt umber or ochre usually dry quicker than modern synthetic shades like phthalo blue, due to differing rates of oxidation. Thus, the choice of color can affect your workflow in significant ways.
Environmental Considerations
Your studio environment plays a vital role. A warmer, drier space can quicken the drying process, while cooler and more humid conditions may slow it down. An artist in Sydney's temperate climate might experience different drying times compared to someone painting in a more arid or humid place.
The Medium Matters
The addition of mediums can both extend and reduce drying times. With the introduction of alkyd mediums, for example, artists can expect accelerated drying. However, they must balance this with the desired viscosity and textural outcomes.
Understanding these variables allows the artist to control the drying times and experiment with different effects, from capturing delicate details to creating robust textures. This scientific foundation in oil painting ensures that each layer not only adheres properly but transforms the canvas into a coherent story of hues and forms.
Factors Influencing Layering Time
When it comes to oil painting, patience truly is a virtue. But how exactly do you determine the right pause between layers? Several factors play a crucial role in dictating this time, and understanding them can elevate your painting techniques to new heights.
Understanding Paint Thickness
First and foremost, the thickness of the paint application is a primary consideration. Thinner layers, synonymous with the glazing technique, will usually dry quicker compared to their impasto counterparts, where paint is applied thickly for texture and depth. This is attributed to the increased exposure of thinner layers to air, which accelerates drying.
Ambient Temperature and Humidity
Your environment greatly affects drying times. Warmer temperatures generally speed up the curing process, while cooler temperatures extend it. High humidity can also slow the drying time, as there is more moisture in the air contributing to a slower evaporation of oils.
The Impact of Different Mediums
Another imperative component to consider is the type of medium you're using. Linseed oil, for example, is a popular choice that provides a balanced drying time, whereas walnut oil dries slower but offers a smoother finish. Alkyd mediums, on the other hand, are fast-drying and can significantly cut down the time needed between layers.
The Role of Pigments
Believe it or not, the pigments themselves have a say in how long you should wait. Earth tones such as umbers dry relatively fast due to their clay content, while cadmiums and cobalts, known for their vibrant hues, might demand a longer waiting period.
Approximate Drying Times of Common Pigments
| Pigment | Average Drying Time |
|---|---|
| Raw Umber | 1-2 days |
| Cobalt Blue | 3-5 days |
| Cadmium Red | 4-7 days |
Adjusting Based on Experience
While these factors provide a guideline, every artist finds a personal rhythm through experience. Test small areas with your techniques and take note of the results. Over time, you'll develop an instinct for gauging when a layer is ready for the next step in your artistic journey.
By understanding and harnessing these elements, you'll not only refine your painting techniques but also mitigate the frustration of miscalculations, ensuring each layer stands out vividly and confidently in your work.
Tips & Tricks for Faster Curing
So, you're looking to speed up the drying time of your oil painting layers? You're in good company. Many artists battle between the tug of creativity and the constraints of time. Thankfully, there are several techniques and materials that can help expedite the drying process without compromising the quality of your work.
Choose the Right Medium
The medium you mix with your oil paints can greatly influence drying times. Linseed oil, for instance, is a traditional choice that can take days to dry, while a medium like alkyds accelerates the process significantly. Experiment with different options to find what works best for your painting techniques.
Understand Paint and Pigment Properties
Not all pigments dry at the same rate. Earth tones such as umbers and ochres tend to dry faster, whereas blacks and whites can be sluggish. By strategically using faster-drying pigments in certain areas of your artwork, you can minimize waiting times between layers.
Control Your Environment
The physical environment plays a substantial role in how quickly oil painting layers cure. Increasing the room temperature or using a daylight lamp can aid evaporation. Just be cautious not to dry your layers too quickly to prevent cracking.
Humidity and Air Circulation
Decreasing humidity levels and enhancing air circulation are effective ways to speed up drying. A dehumidifier or fan can be useful tools. Keep your paintings in a well-ventilated space to avoid stale air that could slow the process.
Apply Thinner Layers
It's simple physics: thinner layers dry faster than thick ones. By applying your paint more thinly and building up layers gradually, you can reduce drying time significantly. Just remember the golden rule: 'fat over lean,' where each successive layer is a bit thicker and more oil-infused than the one before.
Utilize Driers
There are commercial paint driers and additives available that enhance drying rates. Cobalt driers, for example, are popular but need to be used sparingly due to their strength. Read instructions carefully to prevent overpowering your paint's natural texture and sheen.
Open Window to Experience
- Observation: Monitor how your materials behave with different drying setups.
- Record-Keeping: Document techniques and results to refine your process over time.
- Consultation: Engage with communities and forums where fellow artists share insights.
By incorporating these strategies, you can manage your creative time more effectively and maintain momentum in your artistic flow. Your art tips arsenal is now equipped to balance time with your passion for painting.
Common Mistakes to Avoid
The journey of mastering oil painting is as much about learning what to avoid as it is about developing your skills. Artists often find themselves facing unintended results because of simple oversights that could have been prevented. Let’s uncover these common pitfalls and how to sidestep them.
1. Ignoring Drying Time
One of the most frequent mistakes is impatience with drying times. While some might think a quick touch test is enough, oil paints dry through oxidation, not evaporation, meaning it’s hardening from the outside in. Layering too soon can cause the previous layer to wrinkle or crack over time. Always err on the side of caution; it’s wise to allow at least a day or two for thinner layers and longer for thicker applications.
2. Over-Thinning Your Paint
Another misstep is excessively thinning your paint with solvent. While this may quicken drying, it weakens the paint’s adhesive properties. This can result in poor coverage and lackluster colors. Using a quality medium instead of too much thinner can preserve the vibrant hues of your oil painting.
3. Poor Layer Planning
Many artists rush headlong into the creative process without adequately planning their layers. The principle of 'fat over lean'—whereby each subsequent layer of paint should contain more oil compared to the one beneath it—ensures a sound structure and prevents cracking. Start with leaner, thinner layers, gradually building up to richer, thicker applications.
4. Not Considering Environmental Factors
The environment plays a significant role in drying times. Humidity, temperature, and even air movement can affect how fast your layers cure. A cold, damp room will slow down the process, potentially leading to frustration. Consider using a dehumidifier or increasing room temperature slightly to aid drying.
Helpful Environmental Data
| Condition | Effect on Drying Time |
|---|---|
| High Humidity | Slower drying |
| Low Temperature | Slower drying |
| Air Circulation | Faster drying |
5. Neglecting Cleaning Practices
Finally, neglecting to clean your brushes and tools properly can lead to color contamination in your artwork's layers. Ensure brushes are thoroughly cleaned after each session to maintain the purity of each layer you lay down. A quick wipe may seem sufficient, but leftover residue can have a lasting impact.
By being mindful of these common mistakes and taking proactive measures, you’re not just preserving the quality of your art but also cultivating a more refined and patient practice that will set you apart from those in haste.
Creating Depth and Texture with Layers
One of the most enticing aspects of oil painting is the ability to create an illusion of depth and texture that captivates viewers and brings scenes to life. Achieving this visual richness often requires a delicate dance between patience and technique.
The Role of Underpainting
Before delving into intricate layers, artists often start with an underpainting—a monochrome version of the artwork that establishes tonal values. This base layer serves as the skeleton upon which the final image is fleshed out. Allow your underpainting to dry thoroughly; this ensures it will support subsequent layers without blending into them, preserving the contrasts that define your piece.
Building Up Layers
Herein lies the heart of creating depth: the layering process. By patiently stacking thin layers of paint, you can achieve a multi-dimensionality that single-layer techniques simply can't match. Start with dark colors and gradually shift to lighter shades. This process—known as 'working from dark to light'—mimics the way light falls on objects, adding realism to your work.
Textures Using Different Tools
Texture plays a crucial role in oil painting's allure. Experiment with different tools: palette knives can create bold strokes and textures, while brushes of varying stiffness allow for a range of effects, from smooth blends to rough, tactile fields. Try stippling with a stiff brush or using a sponge to dab paint, capturing the essence of varied surfaces such as rugged tree bark or the velvety surface of a rose petal.
Mediums: A Game Changer
Mediums can significantly alter the behavior of your oils. Adding a bit of linseed oil increases translucency, which can lend a glazed look to upper layers, subtly enhancing depth. Impasto mediums, on the other hand, thicken paint for dramatic, textured applications that stand above the canvas.
The Magic of Glazing
Glazing is a technique where transparent layers are applied over dry paint to alter the appearance underneath without painting it out. It can create effects of luminosity and atmospheric perspective. The mystery of light passing through multiple layers can create stunning color transitions that change with every shift in lighting condition.
Timing and Patience
If oils have taught us anything, it's that good things come to those who wait. Each layer should dry sufficiently to avoid unintended mixing. Depending on the aforementioned factors like thickness and ambient humidity, this can span from days to weeks. But remember, every day that your painting is allowed to mature is a day closer to achieving that breathtaking, tactile depth that sets oil masterpieces apart.
Your journey with oil painting is personal, marked by trial, error, and eventually, triumph. Each brushstroke in layered harmony contributes to a canvas that not only narrates a story but invites viewers to touch and feel it. So, wield your brush with both care and courage—your masterpiece is waiting to come alive.
