Value Scale Calculator
This calculator determines the ideal darkest value to start your oil painting based on your subject's brightness. The article explains why starting with dark values creates depth and realism.
Start with Value
Why this value? Starting with dark values creates strong contrast and depth. Your chosen value ensures you have enough tonal range to build realistic shadows and highlights.
The article explains that masters like Rembrandt blocked in shadows first, then added midtones and highlights. This method prevents muddy colors and flat forms.
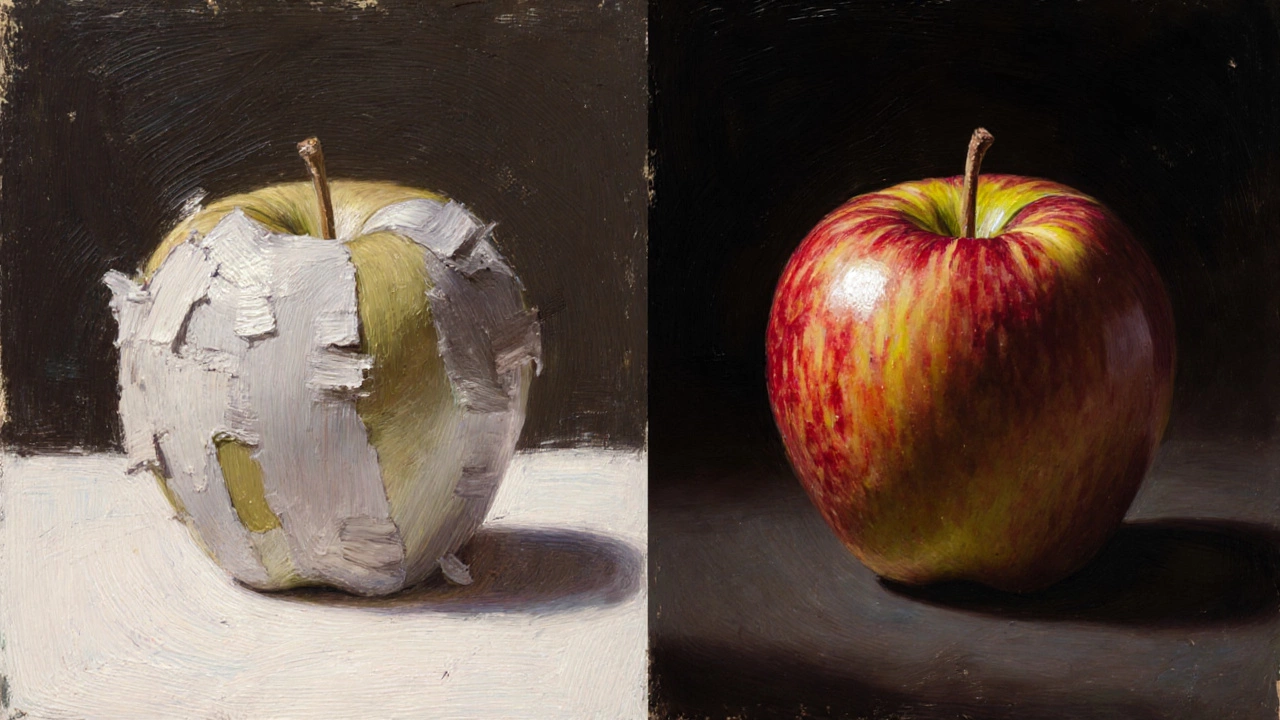
Most beginners think oil painting starts with a bright white canvas and layers of color on top. That’s what tutorials show. That’s what art stores sell. But if you’ve ever painted a sunset, a shadowy figure, or even a simple apple, you know that approach leaves you stuck. The colors look muddy. The contrast is flat. The painting feels lifeless. The truth? Starting with dark in oil painting isn’t just a trick-it’s the foundation of depth, realism, and control.
Why Dark First Works
Oil paint dries slowly. That’s both a gift and a curse. It lets you blend, scrape, and rework-but only if you plan ahead. Starting with dark values means you’re building from the foundation of shadow, not chasing highlights after the fact. Think of it like building a house: you lay the foundation before you put up walls and paint the trim.
When you begin with darks, you’re locking in the structure of your subject. The deepest shadows tell you where the light hits. They define volume. They create the illusion of space. If you start with light, you’re painting the surface, not the form. You end up with a flat, chalky look-like a coloring book that never got shaded.
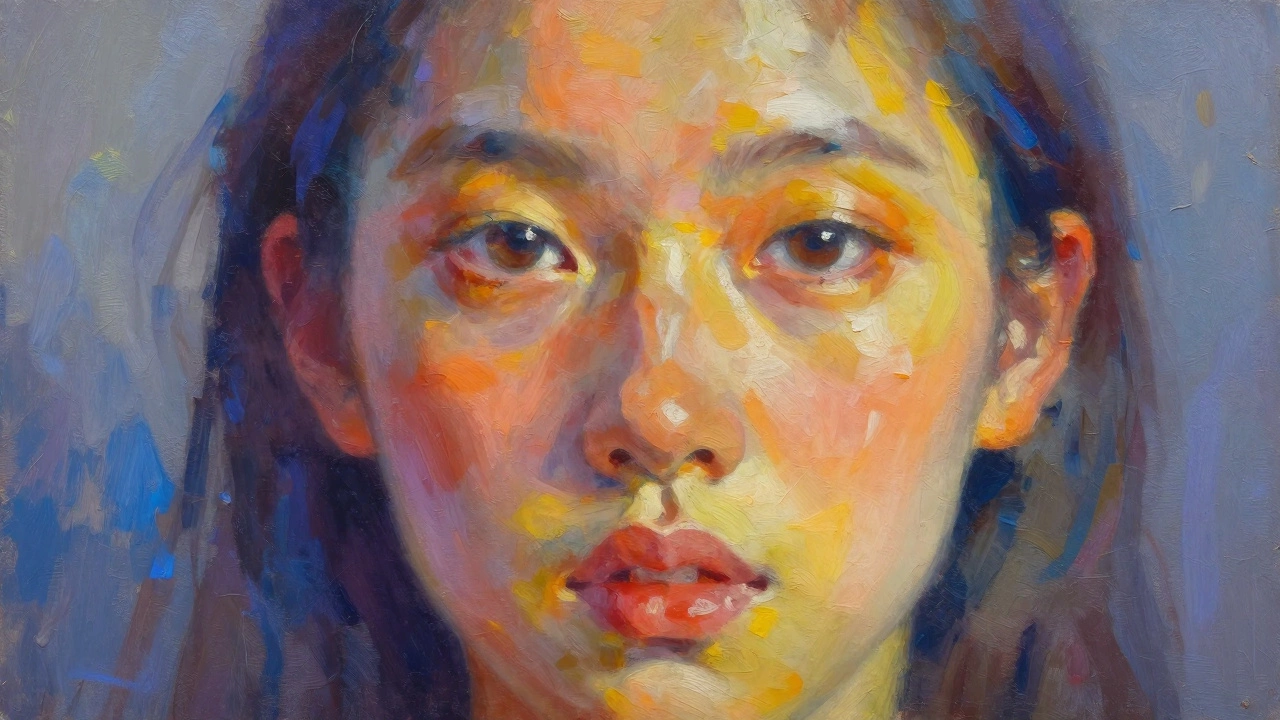
Historically, masters like Rembrandt and Caravaggio didn’t paint from light to dark. They worked from dark to light, using glazes and scumbles to build luminosity. Caravaggio’s chiaroscuro wasn’t magic-it was method. He blocked in the shadows first, then added midtones, then lifted highlights with thick, opaque paint. That’s why his faces seem to glow from within.
The Myth of Starting Light
Why do so many people start with light? Because it feels easier. White paint looks clean. It’s tempting to mix your colors on the palette and slap them onto the canvas. But here’s the problem: once you lay down a light value, it’s hard to cover it. Oil paint is opaque, but not infinitely so. If you paint a bright cheek, then realize the shadow underneath is too dark, you can’t just paint over it. You’ll get a grayish mess.
And here’s the real kicker: light colors dry slower than dark ones. Titanium white, for example, can take days to skin over. If you paint your highlights early, you’re waiting for them to dry before adding anything else. That kills momentum. You lose the flow. You start second-guessing every stroke.
Start with dark, and you’re working fast. Burnt umber, ultramarine, and raw sienna dry quicker. You can block in the whole composition in an hour. Then you let it sit overnight. The next day, you come back with lighter tones and build up. You’re not fighting dried paint-you’re enhancing it.
How to Actually Start with Dark
Here’s how it works in practice:
- Sketch your subject lightly with thinned burnt umber. No detail-just the big shapes.
- Mix your darkest shadows. Use a blend of ultramarine blue, burnt umber, and a touch of alizarin crimson. Don’t use black. It flattens.
- Block in the shadows with a medium brush. Don’t worry about edges. Just lay down the value.
- Let it dry for 12-24 hours. You don’t need it fully cured-just no longer tacky.
- Now mix your midtones. Add a little cadmium yellow or ochre to your shadow mix to lighten it.
- Paint the midtone areas, keeping edges soft where light transitions.
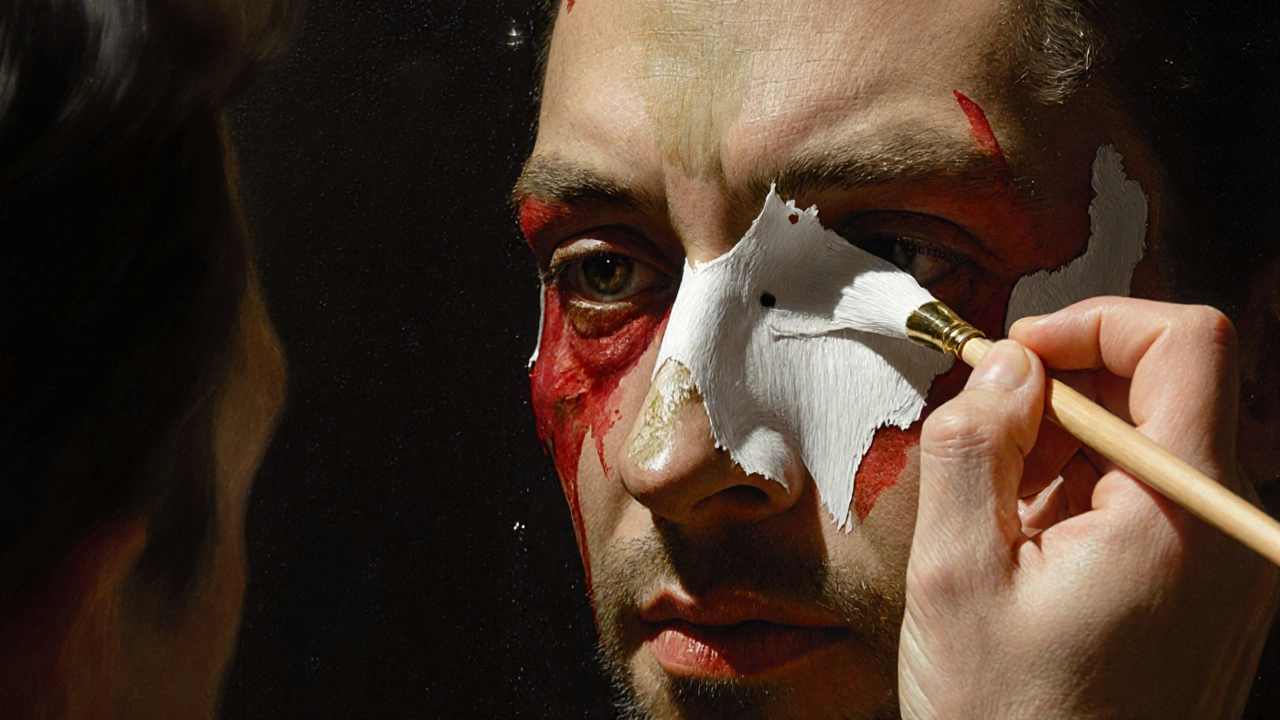
- Finally, add highlights. Use titanium white mixed with a hint of yellow or red to keep it warm. Apply it thickly, almost like sculpting.
That’s it. No mixing every color on the palette. No painting the whole thing at once. You’re working in stages, letting each layer support the next.
What About Light Areas?
You’re not ignoring light. You’re respecting it. When you start dark, you’re actually giving light more power. Think of it like a photograph. The darkest parts make the brightest parts pop. If your shadows are weak, your highlights look like paper, not skin or fabric or metal.
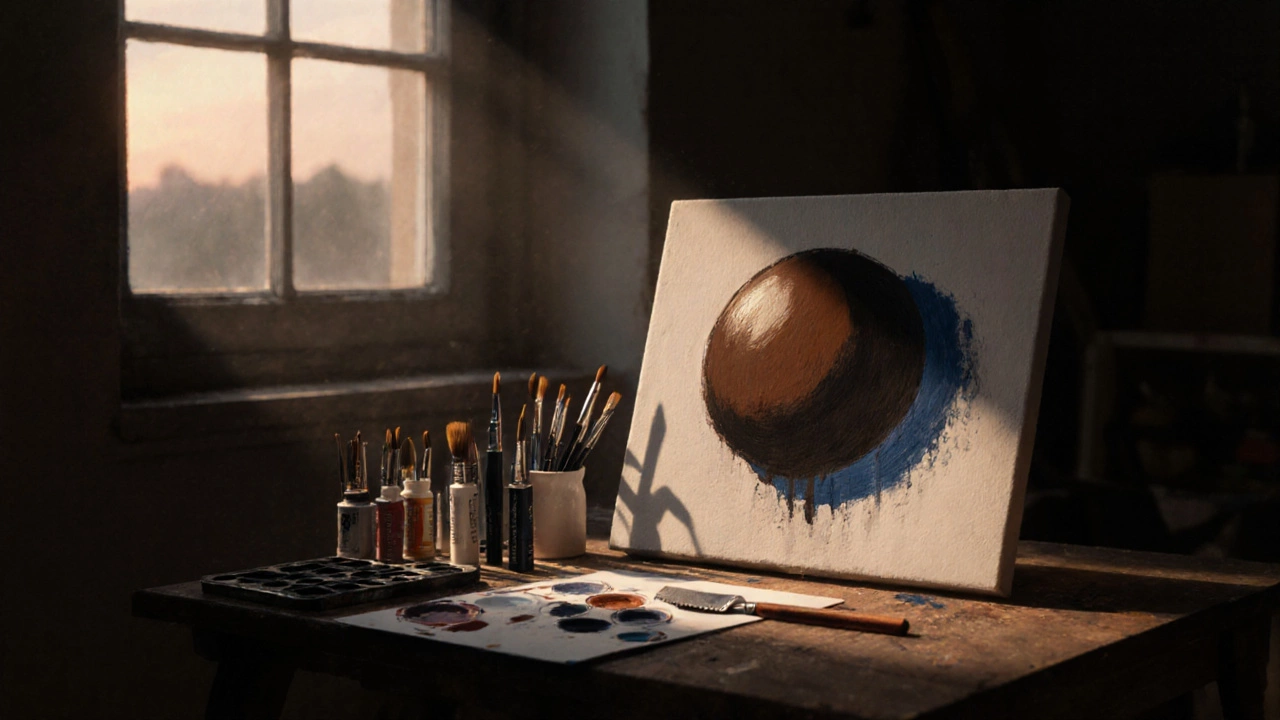
Try this: paint a simple sphere. Start with a dark circle in the center. Then add a midtone ring around it. Finally, paint a thin crescent of white on the edge. Now look at it. The white doesn’t just sit there-it feels like it’s glowing. That’s because the dark behind it is strong enough to make it matter.
Common Mistakes When Starting Dark
It’s not foolproof. Here’s where people go wrong:
- Using too much black. Black kills vibrancy. Use dark blues, purples, and browns instead.
- Painting shadows too hard. Shadows aren’t flat. They have color, texture, and variation. Look at a shadow on a wall in sunlight-it’s not just gray. It’s blue, violet, even green.
- Waiting too long to add light. If you let your dark layer dry too long, you lose the ability to blend. Oil paint doesn’t blend across dry layers well. Keep your dark layer slightly damp, or use a glaze medium to reactivate it.
- Skipping the midtones. Dark to light isn’t just two steps. It’s three: dark, middle, light. Skip the middle, and your painting looks like a cartoon.
When to Break the Rule
Rules are there to teach you, not trap you. There are times when starting light makes sense:
- Painting a very bright, high-key scene-like snow under sunlight. Here, the whole canvas is light, and shadows are rare. You might start with a pale wash.
- Working alla prima (wet-on-wet) in one session. If you’re painting outdoors in an hour, you might skip the dark base and go straight for color.
- Creating abstract or expressive work. If you’re chasing emotion over realism, the rule doesn’t apply.
But if you’re trying to paint something real-skin, fruit, a room, a tree-start dark. It’s not a style. It’s a system.
What Tools Help?
You don’t need fancy gear. But these make it easier:
- Palette knife: For scraping back paint and adjusting values without adding more color.
- Linseed oil medium: Helps keep paint workable longer without thinning it too much.
- Grayscale reference: Take a photo of your subject and convert it to black and white. That’s your value map. Copy it.
- Small brushes (size 2-4): For refining edges once the big shapes are down.
And don’t forget: your eyes lie. What looks dark in the studio might be light in daylight. Always step back. Squint. See the shapes, not the details.
Why This Matters Beyond Technique
This isn’t just about paint. It’s about seeing. When you start with dark, you learn to observe where light is absent before you try to capture where it’s present. That shift-from chasing brightness to understanding darkness-changes everything. You stop painting what you think you see. You start painting what’s actually there.
That’s the difference between a painting that looks like a photo, and one that feels alive.
Should I always start with dark in oil painting?
Not always, but almost always if you want realism. Starting with dark gives you control over contrast, depth, and luminosity. It’s the most reliable method for painting tangible objects like skin, fabric, or wood. Exceptions include high-key scenes (like snow), quick alla prima work, or abstract pieces where emotion overrides structure.
Can I start with light if I’m a beginner?
You can, but you’ll struggle. Most beginners start with light because it feels safer, but it leads to muddy colors and flat forms. You’ll spend more time correcting than creating. Starting with dark is harder at first-it requires planning-but it saves time and frustration later. It’s like learning to drive on a manual transmission: harder to start, but gives you total control.
What’s the best dark color to start with?
Avoid black. Use burnt umber, ultramarine blue, or a mix of both with a touch of alizarin crimson. These create rich, warm shadows that don’t deaden the painting. For example, a shadow on a red apple might be a mix of ultramarine and alizarin-cool enough to feel deep, but still colored. Black makes shadows look like holes.
How long should I wait between layers?
You don’t need to wait days. Let the dark layer dry until it’s no longer tacky-usually 12 to 24 hours. Oil paint forms a skin quickly, even if it’s still wet underneath. Once it’s no longer sticky, you can safely paint over it. For faster drying, use a small amount of stand oil or a fast-drying medium.
Do I need to use glazes to get depth?
No, but they help. Glazes-thin, transparent layers of paint-are how old masters built luminosity. But you can achieve depth with just opaque paint and careful value control. Glazes are advanced. Focus first on getting your darks, mids, and lights right. Once you’re comfortable, glazes will naturally become part of your process.