Oil Painting Smoothness Calculator
Calculate the ideal paint-to-medium ratio and recommended tools to achieve a flawless, glass-like finish based on your desired technique.
Your Smooth Finish Plan
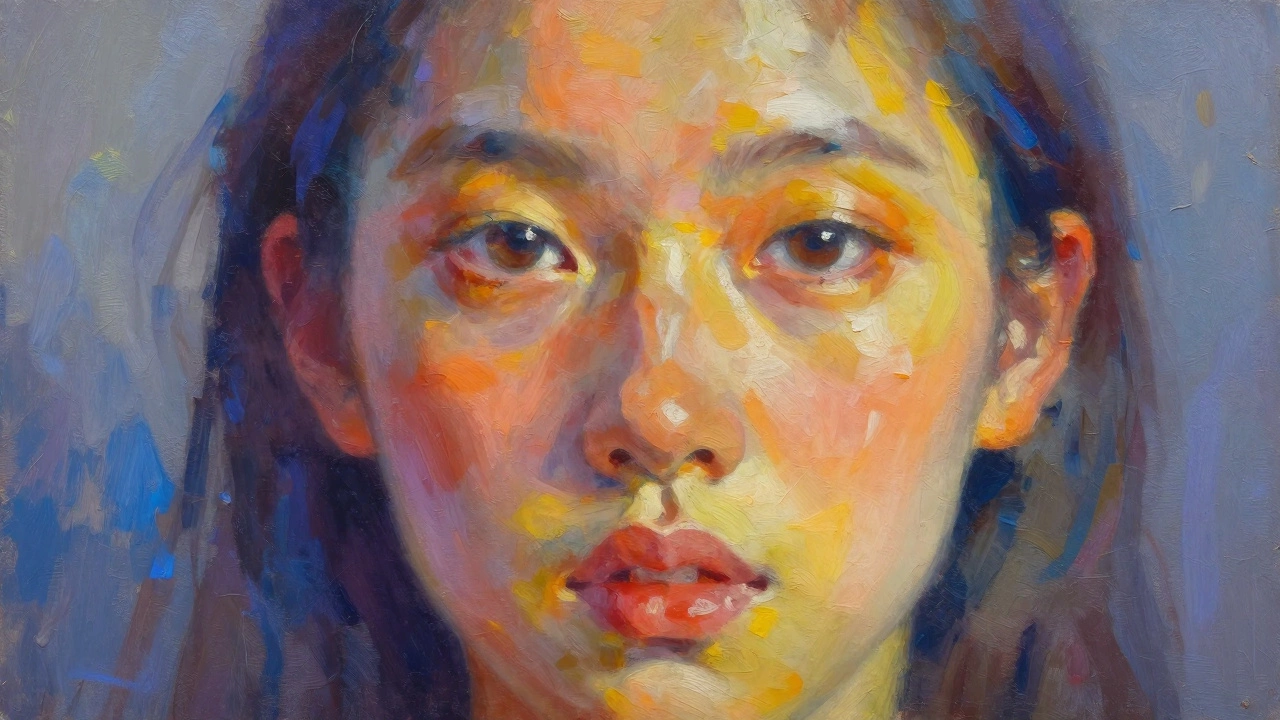
There is nothing more frustrating than staring at a canvas where your brushstrokes look like chaotic scribbles instead of the soft, realistic skin or misty sky you envisioned. You want that glass-like finish, the kind seen in classical portraits or serene landscapes, but every time you lift your brush, the texture remains rough and visible. Getting a smooth oil painting isn't about magic; it is about controlling viscosity, timing, and pressure. It requires a shift from treating paint like a solid paste to handling it like a liquid medium.
Achieving this level of polish takes patience and specific materials. If you are used to thick, buttery applications, you need to rethink your approach entirely. The secret lies in thinning your paints correctly, using the right tools, and understanding how layers interact with one another. Let’s break down exactly how to eliminate those stubborn brush marks and create a surface so even you might mistake it for a photograph.
The Foundation: Preparing Your Surface
You cannot build a smooth house on a shaky foundation, and the same applies to oil painting. If your canvas has a heavy weave or a coarse texture, no amount of glazing will hide the bumps underneath. For a truly seamless finish, start with a fine-tooth linen or cotton canvas. These fabrics have tighter weaves that provide a flatter base compared to standard coarse canvases.
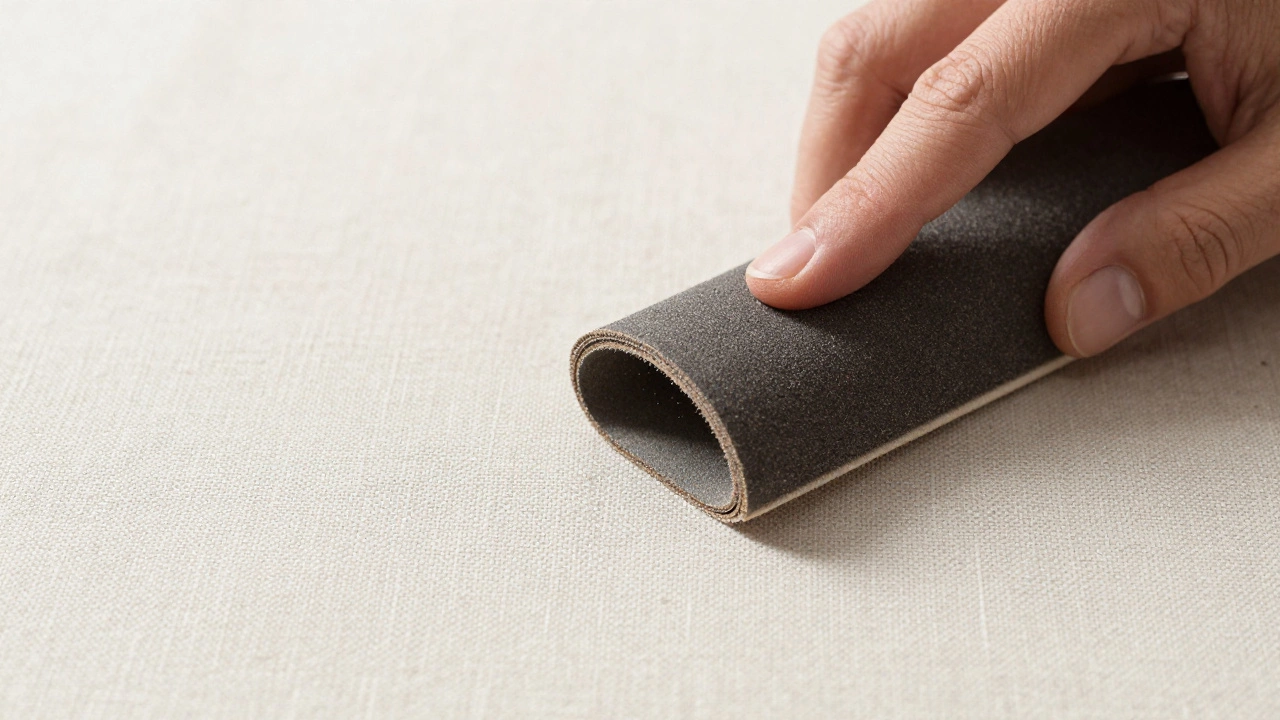
Before you apply any paint, consider applying a ground layer. A traditional gesso ground is good, but for maximum smoothness, some artists apply a thin wash of diluted white paint or a specialized acrylic gesso followed by sanding. Yes, sanding. Using fine-grit sandpaper (around 400 grit) on your dry gesso layer removes microscopic ridges. This creates a tooth that is just enough to hold the paint but smooth enough to allow your brushes to glide effortlessly. Skip this step, and you will spend half your career fighting the canvas texture rather than focusing on your image.
Choosing the Right Tools
Your choice of brush dictates your final texture. Stiff bristle brushes, often made from hog hair, are excellent for mixing colors and applying thick paint, but they are your enemy when seeking smoothness. Bristle brushes leave distinct streaks and drag paint across the surface, creating ridges.
Instead, switch to soft-haired brushes. Sable brushes, particularly Kolinsky sable, are the gold standard because their hairs taper to a fine point and hold a massive amount of fluid without shedding. Synthetic equivalents, like Taklon fibers, have improved significantly and offer a durable, affordable alternative that mimics the softness of natural hair. Look for rounds or filberts with long handles, which give you better control over pressure. You want a brush that feels like an extension of your hand, not a scrubbing tool.
Don’t overlook the importance of palette knives. While often associated with impasto (thick texture), a flexible palette knife can be used to scrape off excess paint and blend edges seamlessly. It acts as a smoothing iron for your paint, allowing you to flatten areas without introducing new brush marks.
Thinning Paint: The Role of Mediums
Oil paint straight from the tube is thick and opaque. To achieve transparency and flow, you must thin it. However, simply adding turpentine or mineral spirits can weaken the paint film, leading to cracking later. The key is using a proper medium that maintains the integrity of the binder while increasing fluidity.
Liquin or similar alkyd-based mediums are game-changers for smooth painting. They speed up drying times slightly and allow the paint to level out, meaning the peaks and valleys of your brushstrokes settle into a flat plane as they dry. When mixing, aim for a consistency similar to heavy cream. If it’s too thick, it drags; if it’s too thin, it becomes watery and loses pigment strength. Always mix your medium thoroughly with your color on the palette before touching the canvas. This ensures an even distribution of binders, preventing shiny spots next to matte areas.
Technique 1: Wet-on-Wet Blending
Wet-on-wet painting involves applying fresh paint onto a still-wet underlayer. This method allows colors to merge directly on the canvas, creating gradual transitions without hard edges. It is ideal for organic forms like faces, clouds, and foliage.
- Start Light: Begin with lighter values and work into darker ones. Darker pigments tend to dominate, making it harder to lighten areas once mixed.
- Use Minimal Pressure: Dragging your brush hard digs into the wet paint below, muddying the colors. Instead, float your brush lightly over the surface, nudging the paint around.
- Clean Brushes Frequently: Wipe your brush on a rag between strokes. A dirty brush mixes unintended colors on the canvas, creating grayish, muddy tones that ruin the clarity of your smooth gradient.
- Blend Edges Only: Keep the core of your shapes defined and only soften the boundaries where two colors meet. This preserves form while achieving the desired softness.
This technique requires working quickly within the open time of the paint. If the underlying layer starts to tack up, stop blending. Forcing wet paint into semi-dry paint results in a messy, textured mess rather than a smooth transition.
Technique 2: Glazing for Depth and Polish
If wet-on-wet feels too unpredictable, glazing is the classical route to perfection. Glazing involves applying a thin, transparent layer of color over a completely dry underpainting. Because the layer is translucent, light passes through it, reflects off the white ground below, and bounces back, creating a luminous, jewel-like quality.
To glaze effectively, you need high transparency. Earth tones like burnt sienna, yellow ochre, and ultramarine blue are naturally transparent. Tube whites and titanium yellows are opaque and should be avoided in glazes. Mix your chosen color with a generous amount of medium-aim for a ratio of 1 part paint to 3 parts medium. Apply this mixture evenly over the dried layer. The medium helps the paint self-level, eliminating brushstrokes as it dries.
Glazing builds depth gradually. One glaze might not make a huge difference, but three or four layers will transform a flat image into a rich, dimensional piece. Each layer must dry completely before the next is applied. This process takes time, but the result is a surface that looks polished and professional, free from the tactile evidence of the artist’s hand.
Common Pitfalls and How to Avoid Them
Even with the right techniques, mistakes happen. Here are the most common issues that disrupt smoothness and how to fix them.
- Muddy Colors: This happens when you over-blend complementary colors (like red and green) on the canvas. Solution: Mix your colors cleanly on the palette before applying them. Limit blending to adjacent hues.
- Cracking: If you apply thick, slow-drying oil paint over fast-drying thinned layers, the top layer may crack as it shrinks. Solution: Follow the "fat over lean" rule. Lean (thin) layers go first; fat (oily/thick) layers go last. For smooth paintings, keep all layers relatively thin and consistent in medium usage.
- Visible Brush Marks: If your brush is too stiff or your paint is too thick, marks will remain. Solution: Switch to softer brushes and ensure your paint is sufficiently thinned with medium. Use a cross-hatching motion with very light pressure to break up directional strokes.
Drying and Final Touches
Once your painting is complete, resist the urge to touch it. Even after it looks dry, oil paint continues to cure for months. Dust particles settling on a tacky surface can embed themselves, ruining the smooth finish. Place your painting in a clean, dust-free area to dry vertically. Horizontal drying can cause solvents to pool, creating uneven sheen.
If minor imperfections remain after drying, you can gently sand the surface with ultra-fine sandpaper (600+ grit) and apply a final varnish. Varnish unifies the sheen, protecting the paint and enhancing the depth of the colors. It provides that final glossy coat that ties everything together, hiding any microscopic variations in texture.
What is the best medium for smooth oil painting?
Alkyd-based mediums like Liquin are highly recommended for smooth finishes. They increase the flow of the paint, help it level out to remove brushstrokes, and accelerate drying times slightly without compromising the flexibility of the paint film. Traditional linseed oil works but dries slower and can yellow over time.
Can I use acrylic gesso on canvas for oil painting?
Yes, acrylic gesso is an excellent primer for oil painting. It creates a stable, non-yellowing barrier between the canvas fibers and the oil paint. For extra smoothness, apply multiple thin coats and sand between each layer to create a perfectly flat surface.
Why does my oil painting look muddy when I try to blend?
Muddiness usually occurs when you mix too many colors directly on the canvas, especially complementary colors like red and green or blue and orange. To avoid this, pre-mix your colors on the palette to achieve the exact hue you want before applying it. Limit blending to transitional areas and keep your brushes clean.
How long should I wait between glazing layers?
You must wait until the previous layer is completely dry to the touch and no longer tacky. Depending on thickness and humidity, this can take anywhere from 24 hours to a week. Applying a new glaze over a damp layer will lift the underlying paint and create a messy, textured surface.
Do I need expensive sable brushes for smooth painting?
While Kolinsky sable brushes are superior, high-quality synthetic brushes made from Taklon fibers can achieve similar results at a lower price point. The key is softness and springiness. Avoid stiff bristle brushes, as they inherently create texture. Test different brands to find synthetics that hold a sharp point and release paint smoothly.