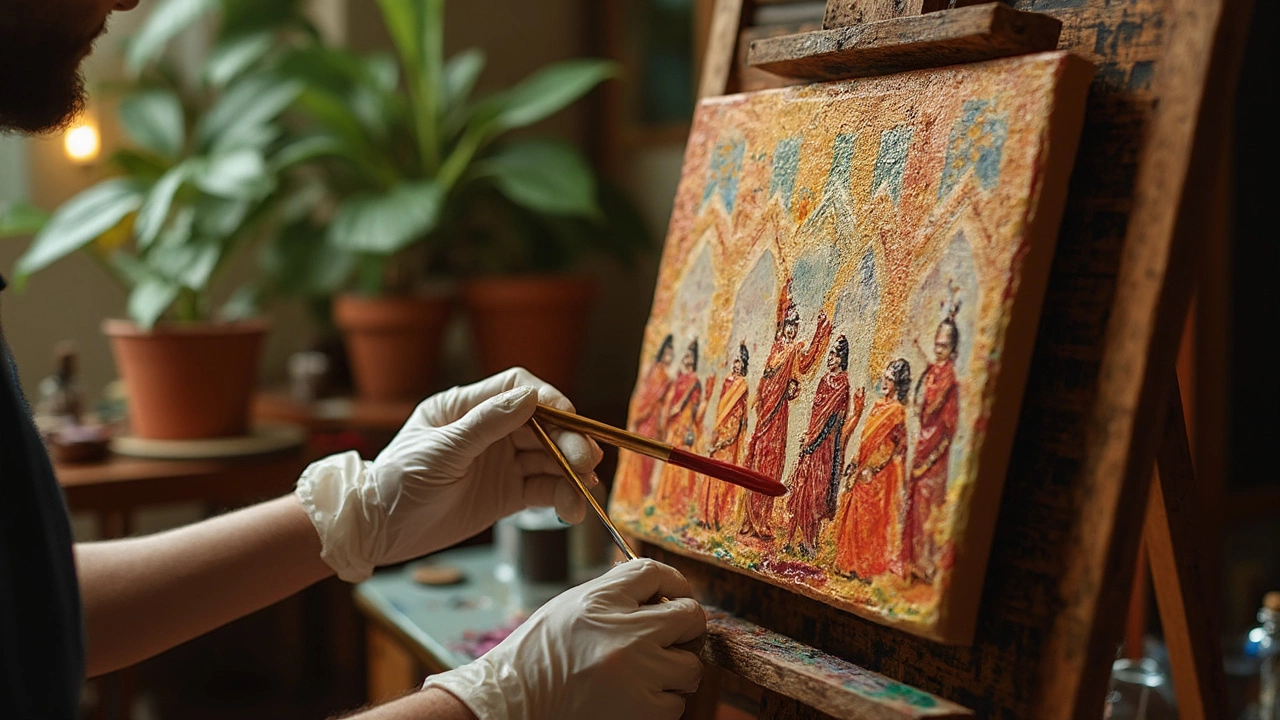
The word “stripping” in painting might sound a bit dramatic, but it’s just a fancy way of talking about erasing or removing layers of paint you don’t want anymore. Maybe your colors turned muddy, maybe a detail looks off, or maybe you just want a clean slate. Whatever the reason, stripping isn’t as scary as it sounds—if you know what you’re doing.
Artists use stripping to fix big mistakes or reuse a canvas. It's not just for professionals either—hobby painters do it all the time at home. The trick is to use the right tools and methods, so you don’t mess up the surface or leave strange streaks and sticky patches behind. Sometimes it’s as simple as wiping wet paint with a rag, and other times you’ll need a bit more muscle or help from safe solvents.
Start slow: test your method on a tiny spot first. A small slip is easier to hide than a full-blown disaster across the whole canvas. And don’t be fooled—certain paints react differently depending on how dry they are, and the canvas or board underneath matters too. There’s an art (pun intended) to stripping, just like there’s an art to everything else with painting.
- What Is Stripping in Painting?
- When Should You Strip a Painting?
- Common Methods for Stripping Oil Paint
- Risks and How to Avoid Them
- Tips to Strip Without Damaging Your Canvas
- Getting Back to Painting After Stripping
What Is Stripping in Painting?
Stripping in painting means getting rid of one or more layers of paint so you can either start fresh, fix mistakes, or recycle your canvas. In oil painting, this isn’t just a last resort—lots of artists do it to save time, supplies, and money or to correct a piece without having to buy a new canvas. Stripping is all about controlling what’s on your surface and not being stuck with something you don’t like.
The main idea is to remove paint—either when it’s still wet (much easier!) or even after it’s dried. Wet stripping is basically blotting or wiping with a rag, palette knife, or even your fingers. Dried paint takes more effort and might need special products, like mild solvents, but you have to be gentle to avoid tearing or scratching.
Why even bother? Paint is expensive, canvases cost enough already, and no one wants to throw away good materials because of a fixable mistake. Plus, if you want to experiment or try bolder techniques, knowing you can always strip paint off gives you more freedom.
Here’s a simple breakdown of when and why artists strip, plus a look at what usually happens depending on how dry the paint is:
| Stage | Paint Condition | Typical Methods | Best For |
|---|---|---|---|
| Wet | Still sticky/fresh | Rag, paper towel, scraping, cotton swabs | Immediate corrections, removing whole passages |
| Tacky | Semi-dry, touchable but not cured | Careful scraping, light solvent, scratch-off | Fixing recent work, cleaning up details |
| Dry | Fully cured | Solvent, sanding (rare), scraping with caution | Reusing canvas, major changes |
Whether you’re a new painter or you’ve been at it for years, stripping lets you make bold moves—knowing you can undo them if they don’t work out. That’s a game changer for creativity and confidence. If you use thick layers or love to layer up glazes and textures, it’s good to know what stripping can (and can’t) handle for your process.
When Should You Strip a Painting?
Deciding when to strip a painting is all about knowing what you want out of your project. Not every mistake deserves the nuclear option. There are a few clear signals that it's actually worth it to strip all or part of an oil painting.
- Mistakes That Can't Be Fixed in Layers: If you’ve got a thick, dark area that shows through every fresh coat, or a sketch that’s totally off—it’s usually easier to just remove the problem instead of piling on more paint.
- Reuse of Canvas: Good canvases aren’t cheap. If you want a do-over or start fresh, stripping old oil paint is a budget-friendly move. Lots of artists—including me—keep canvases going for years this way.
- Paint Layer Problems: Sometimes different paints react weirdly together. Ever put oil on wet acrylic by accident, or paint over a half-dry mess? You might see cracking or puckering, which usually means it’s time to strip.
- Restoration Work: This comes up more with older pieces, but sometimes you want to save the canvas and ditch the damaged paint. It’s a classic trick in art restoration.
Here's a quick comparison of common reasons why people strip paintings:
| Reason | Typical Solution |
|---|---|
| Major composition errors | Full or partial stripping |
| Surface is too slick or textured | Remove paint, re-gesso if needed |
| Cost-saving reuse of a canvas | Strip old paint and prep new surface |
| Paint incompatibility (cracking, puckering) | Remove affected layers |
| Removing varnish or old repairs | Gentle stripping only |
One thing to keep in mind: stripping oil paint can only be done safely if the painting is fully dry (cured). Tackling wet or partly dry paint will just smear things around and can ruin the fabric underneath. Most oil paintings take at least six months to cure enough for safe stripping.
Common Methods for Stripping Oil Paint
There’s no one-size-fits-all way to strip oil paint—it really depends on whether your paint is still wet, kind of tacky, or bone dry. Each method comes with its pros, cons, and a few things to watch out for. Here’s a breakdown of the most common methods artists actually use in their studios and home setups.
- Wiping with a Rag or Paper Towel: If your paint is still wet or just a bit tacky, often you can just wipe the area with a clean, lint-free rag or a sturdy paper towel. Some folks dampen the rag slightly with odorless mineral spirits or turpentine for a cleaner swipe, but be gentle—scrubbing will just rough up the canvas.
- Scraping: For thicker layers or when the paint is tacky but not dry, a palette knife works wonders. Gently scrape off what you can. Make sure you use the flat side of the blade, not the edge, to avoid cutting the canvas. Bonus: Save the scraped-off paint for texture or mixing if you want to get resourceful.
- Solvents: If the paint has started to dry, this is where things get a bit technical. Dip a cloth in a bit of solvent (usually odorless mineral spirits or genuine turpentine—never paint thinner from the hardware store), and work methodically. Test solvents first since some can eat through canvas priming or loosen old glue.
- Commercial Paint Removers: There are artist-grade paint removers like Winsor & Newton’s Brush Cleaner & Restorer. These are much gentler than hardware store removers, but you still need ventilation and gloves. Always read the label—some removers work better on oil than acrylics.
- Sanding: If you’re dealing with a rock-hard, dried paint layer and nothing else works, sanding could be your last shot. Use a super fine grit, go lightly, and watch for canvas threads showing through. This works best on wood panels, not stretched canvas.
Choosing the best method can be confusing, so here’s a quick table to help compare them:
| Method | Best For | Pros | Cons |
|---|---|---|---|
| Wiping | Wet/Fresh Paint | Quick, minimal damage risk | Limited to fresh paint only |
| Scraping | Tacky or thick paint | Easy for small areas | Can damage if rushed |
| Solvents | Drying or fully dry paint | Cleans well | Can harm canvas/priming |
| Commercial Removers | Tough spots/all over | Strong, effective | Expensive, needs good airflow |
| Sanding | Dry, stubborn layers | Can level bumps/texture | Risky for thin canvas |
No matter which method you pick, wear gloves and protect your workspace. Kids, pets, and precious carpets do not mix with paint stripping. And remember, less is often more—strip a little at a time instead of going all-in and regretting it later. If in doubt, test somewhere small and hidden first so you don’t end up worse off.
Out of all these, using a solvent is the most common for oil painting. Just remember, a gentle touch makes all the difference between a quick fix and a disaster.

Risks and How to Avoid Them
Stripping in oil painting sounds simple but can go wrong fast if you're not careful. The most obvious risk is damaging your canvas or board. Too much scrubbing, strong chemicals, or even just getting too aggressive can break down the surface, leaving you with a floppy or warped canvas that's basically useless for painting.
Another problem is leftover residue. If you use something like turpentine or a commercial paint remover (especially on older paintings), they don’t always rinse off clean. That sticky or oily residue means new paint might not stick or could crack later. Here’s a quick look at what you should watch out for and some practical ways to dodge these headaches:
- Test Before You Go Big: Always test your chosen solvent or method on a small corner before committing to the whole area.
- Be Careful With Solvents: Some solvents used to strip oil painting layers are strong enough to eat through glue, gesso, or even weaken canvas fibers. Go with milder options when you can. If you have to use something strong, don’t soak—dab lightly.
- Watch the Timing: Wet paint comes off easier than dried paint. If the paint is just a few days old, rubbing with a rag and some mild solvent should do the trick. Wait too long, and you’ll need tougher methods (and that increases the risks).
- Avoid Over-Scrubbing: Scraping seems tempting but pressing down too hard will gouge your surface. Use tools gently and only as much as you need.
- Proper Ventilation: Stripping often means fumes. Make sure you work in a space with good airflow. If you suddenly feel dizzy or get a headache, step outside and take a break.
Here's a quick table with some common problems and how to avoid them:
| Common Problem | Risk Level | How to Avoid |
|---|---|---|
| Surface damage | High | Use gentle tools and mild solvents, test first |
| Sticky residue | Medium | Use minimal solvent, wipe down with clean rag |
| Poor paint adhesion | High | Let surface dry completely before repainting |
| Health risks from fumes | Medium | Work with windows open, wear a mask if needed |
| Canvas warping | Low to Medium | Don’t over-wet canvas, avoid drenching with liquid |
When in doubt, less is more. You can always do a little more stripping, but you can’t undo a shredded canvas. Take it slow, don’t rush, and always protect yourself and your artwork.
Tips to Strip Without Damaging Your Canvas
If you want to strip paint off your canvas but don’t want to end up staring at a ruined surface, you’ve got to be smart about your choices. First rule? Go gentle. Scrubbing or using harsh chemicals can do more harm than good. Even though your impulse might be to go at it full-force, your canvas is pretty fragile—especially if you use thin cotton or linen.
Let’s talk about a few ways to keep your oil painting safe:
- Test First: Pick a hidden corner and try your method there before hitting the main area. If it messes up, you’re not out your whole painting.
- Use the Right Solvent: Odorless mineral spirits are less aggressive than pure turpentine and less likely to eat through canvas sizing or primer. Never use random household cleaners—they often break down the fabric.
- Keep Things Damp, Not Soaked: Dip your rag or cotton swab lightly in solvent—don’t drench it. Too much liquid can bleed through and mess up the glue or wood stretchers underneath.
- Avoid Metal Tools: Metal scrapers or palette knives can cut the canvas or leave permanent dents. Plastic or rubber spatulas are much gentler if you need to lift dried paint.
- Watch Your Timing: Wet paint is WAY easier to remove than dry. If you catch a mistake early, sometimes a swipe with a clean cloth is all it takes.
- Work in Ventilated Areas: Solvents that are safe for art can still give you a headache or worse if you’re cooped up. Open a window or run a fan.
Here’s a quick glance at the risk levels for different stripping methods. You can use this as a cheat sheet:
| Method | Risk to Canvas | Best For |
|---|---|---|
| Odorless Mineral Spirits | Low | Fresh or lightly dried paint |
| Turpentine | Medium | Stubborn, dry layers (with care!) |
| Plastic Scrapers | Medium | Thick, semi-dry paint blobs |
| Rags/Q-tips (dry) | Low | Still wet or tacky paint |
| Household Cleaners | High | Never recommended |
| Metal Tools | High | Only for hard surfaces, not canvas |
One last thing: patience pays off. Quick fixes almost always backfire. Slow and careful gets you a blank canvas that’s good as new—or at least, good enough for another creative round. If you’re ever unsure, ask around in artist groups or check with your local art store; they’ve probably seen every rookie move under the sun.
Getting Back to Painting After Stripping
Once you’ve stripped away unwanted paint, you don’t want to rush straight into adding new layers. Jumping in too quickly is a recipe for future headaches—paint might not stick, or worse, you could end up with cracks and peeling later on. The surface needs to be clean, dry, and a little bit rough so new paint can grip properly.
First up, double-check that you’ve removed all solvent residue, especially if you used something like turpentine or isopropyl alcohol. Many painters skip this, then wonder why their new paint layer stays tacky or refuses to dry. Grab a lint-free cloth, dampen it with clean water, and give the surface a gentle wipe-down. Leave it to dry thoroughly—oil paint hates water, so no shortcuts here!
If the canvas feels too smooth after stripping, you’ll want to gently sand the area. Use a fine-grit sandpaper (around 220-320 grit is perfect). Sand lightly, just enough to give the canvas some tooth so the fresh paint has something to hang onto. Wipe away any dust with a clean cloth.
Sometimes, the stripped area ends up patchy or reveals raw canvas in spots. This is where a quick layer of gesso or acrylic primer comes in handy. It acts as a base coat and helps prevent oil paint from soaking straight into the fabric, which is a classic cause of dull spots. Apply a thin, even layer and wait for it to dry completely—most primers are touch-dry in one hour, but check your label just to be sure.
- If you just stripped a small section, spot-prime only that area.
- If things got messy and the whole canvas is affected, a full re-priming makes sense.
Now you’re good to go. You might be surprised to know that professional conservators follow similar steps when restoring damaged pieces in museums. Here’s a cheat sheet you can save for future reference:
| Step | Best Practice |
|---|---|
| Remove residue | Wipe with clean, damp (not wet) lint-free cloth |
| Let dry | Wait at least a few hours—or overnight for safety |
| Sand lightly if needed | Use fine-grit sandpaper (220-320), wipe dust off |
| Prime if exposed canvas | Apply thin gesso layer, let dry per instructions |
| Paint again | Start with oil painting layers once primed areas are dry |
Rushing the prep work can undo all your hard efforts in the long run. Take your time, double-check each step, and you’ll have a surface ready to handle your next burst of creativity without any surprises.


