Portrait Color Mixer
Mix Your Skin Tones
Use the article's recommended 5-color palette to create realistic skin tones. Adjust the sliders to see how values change.
How this works
Adjust the sliders based on your skin tone reference. More white creates lighter tones. More red/yellow creates warmer tones. Ultramarine blue cools tones for shadows.
Pro Tip: Remember the article's advice: focus on value (light/dark) over color. A well-mixed gray-scale portrait will have more depth than a colorful but flat one.
Painting a portrait feels intimidating. You stare at the face-eyes, nose, lips-and wonder where to even begin. You’ve seen masterpieces, watched YouTube tutorials, and now you’re holding a brush, paralyzed by the fear of messing up someone’s likeness. But here’s the truth: portrait painting doesn’t start with perfection. It starts with observation, structure, and patience.
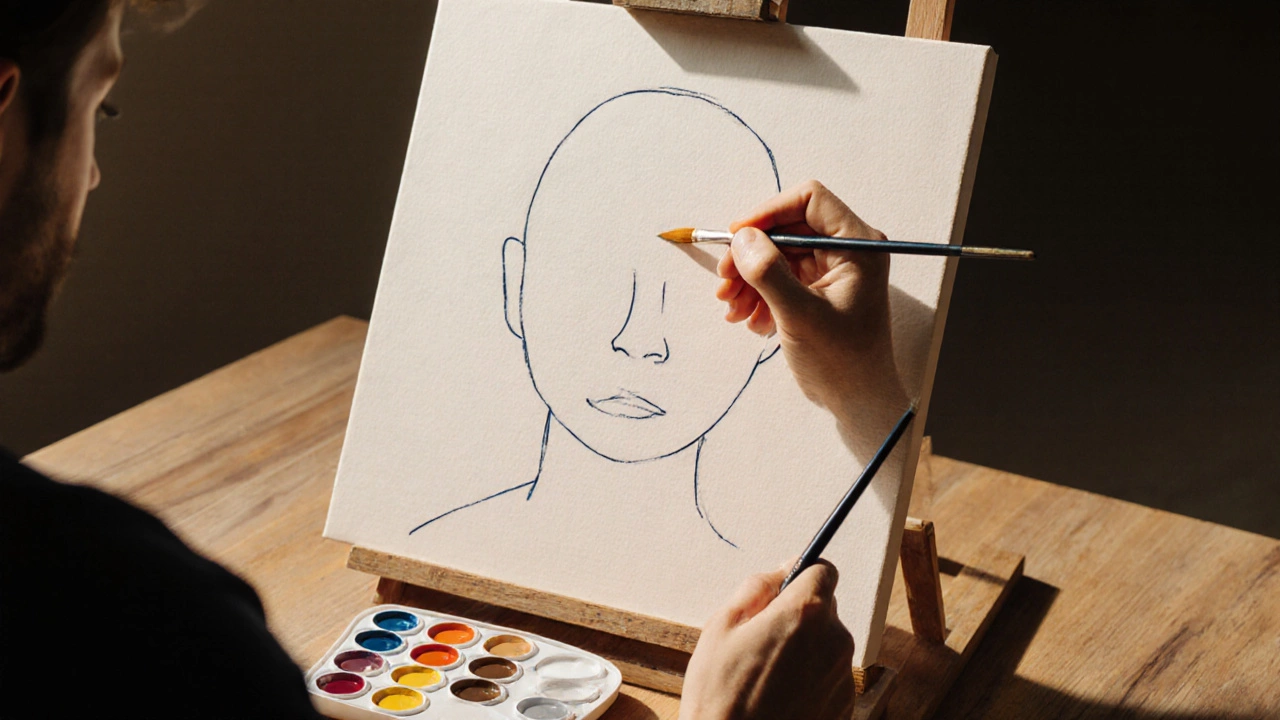
Start with the Shape, Not the Details
Most beginners jump straight to drawing eyes or shading cheeks. That’s like trying to build a house by putting in the windows first. You need the frame before the wallpaper. Begin by blocking in the overall shape of the head. Use a soft pencil or thin brush to sketch a simple oval. Then add a vertical centerline and a horizontal line for the eyes. These aren’t measurements you need to be exact about-they’re guides. The eyes sit roughly halfway down the head. The bottom of the nose is about halfway between the eyes and the chin. The mouth is a third of the way from the nose to the chin. This isn’t about copying a photo. It’s about understanding proportions. Even if you’re painting from life, use these rules as your anchor. They’ll keep you from making the head too long, the eyes too high, or the chin too sharp.Use a Limited Palette to Avoid Overwhelm
You don’t need every shade of red, brown, and yellow to paint a convincing portrait. Start with five colors: titanium white, cadmium red, yellow ochre, burnt sienna, and ultramarine blue. That’s it. Mix these to create skin tones. Add a touch of blue to warm tones to cool them down. Add a hint of red to make cheeks flush. Burnt sienna gives you earthy shadows. Yellow ochre warms the highlights. White isn’t just for brightness-it’s for softening edges and creating transitions. Painting with a limited palette forces you to focus on value (light and dark) instead of color. And value is what makes a portrait look real. A perfectly colored face with wrong values will look flat. A simple gray-scale portrait with correct values will look alive.Paint from Dark to Light
One of the biggest mistakes beginners make is painting the whole face in one go-light, midtone, shadow-all at once. That leads to muddy colors and lost forms. Instead, start with the darkest areas. Block in the shadows under the jawline, the eye sockets, the sides of the nose. Use a thin brush and a mix of ultramarine blue and burnt sienna. Let it dry. Then move to the midtones. These are the skin tones you see in the flat areas of the face. Don’t blend too much yet. Keep your brushstrokes intentional. Finally, add the lightest areas-highlights on the forehead, cheekbones, tip of the nose. Use mostly white with a whisper of yellow ochre. This approach builds depth naturally. Each layer informs the next.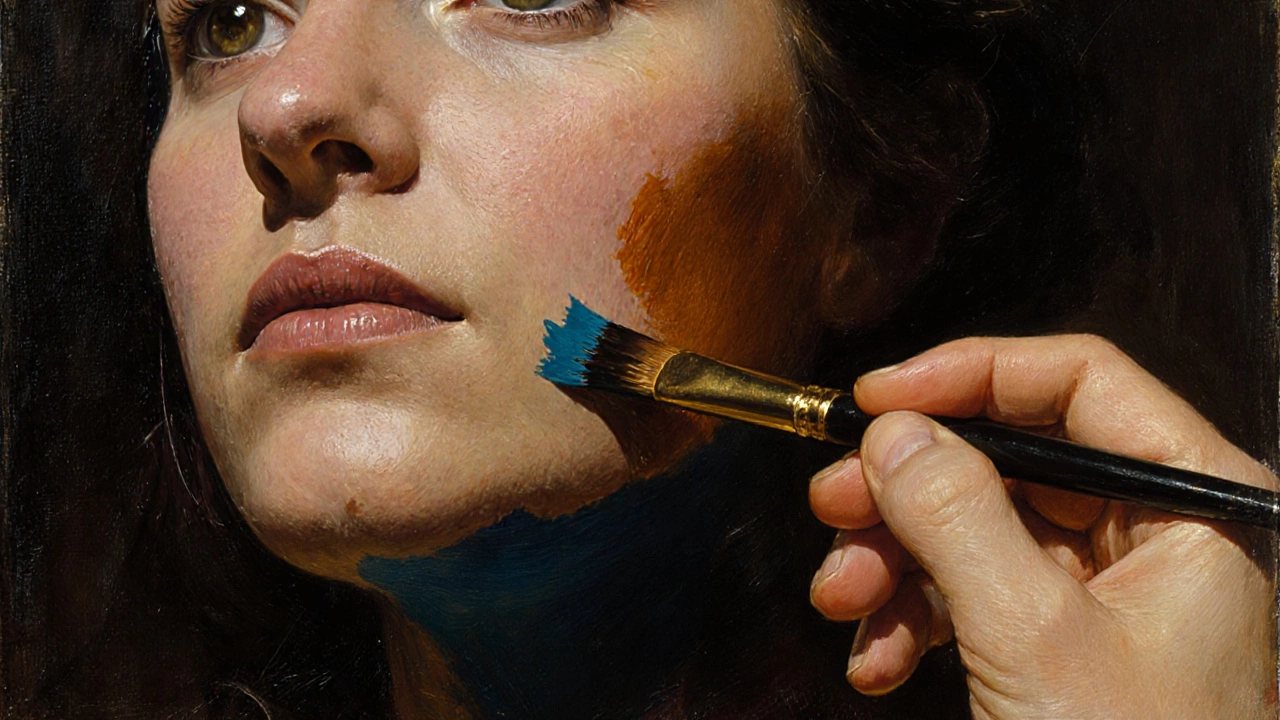
Focus on the Eyes Last
The eyes are where people expect to see life. But they’re also the hardest part to get right. If you paint them too early, you’ll fixate on them and lose the rest of the portrait. Paint the eye socket first-a dark, recessed shape. Then the iris. Don’t make it a perfect circle. Real irises have variations in color and texture. Add a tiny white dot for the catchlight, but don’t overdo it. One or two dots are enough. The eyelids matter more than you think. The upper lid casts a soft shadow over the eyeball. The lower lid is rarely flat-it curves slightly. Pay attention to how the eyelashes grow in clusters, not as individual lines. Don’t rush the eyes. Wait until the rest of the face is 80% done. Then come back. You’ll see them with fresh eyes.Paint the Background Before the Face
Most people paint the background last, thinking it’s just filler. But the background sets the tone. A dark background makes the face pop. A light background creates a soft, airy feel. A colored background can influence the skin tone. Paint the background first, using a large brush. Let it dry completely. Then paint the face over it. This gives you a clean edge and helps you judge the value of the skin. If the background is dark, you’ll know your highlights need to be brighter. If it’s warm, you’ll adjust your shadows accordingly. This trick is used by old masters like Rembrandt. It’s not about being lazy-it’s about controlling contrast from the start.Step Back Often
You’ll spend hours hunched over your canvas, tweaking a single eyebrow. But your eyes get used to what’s there. You stop seeing mistakes. Step back every 15 minutes. Walk across the room. Look at your portrait from five feet away. Squint. What do you see? If the face looks like a blob, your values are off. If the nose looks crooked, your proportions are off. Use a mirror. Hold it up to your painting. The reversed image tricks your brain into seeing flaws you missed.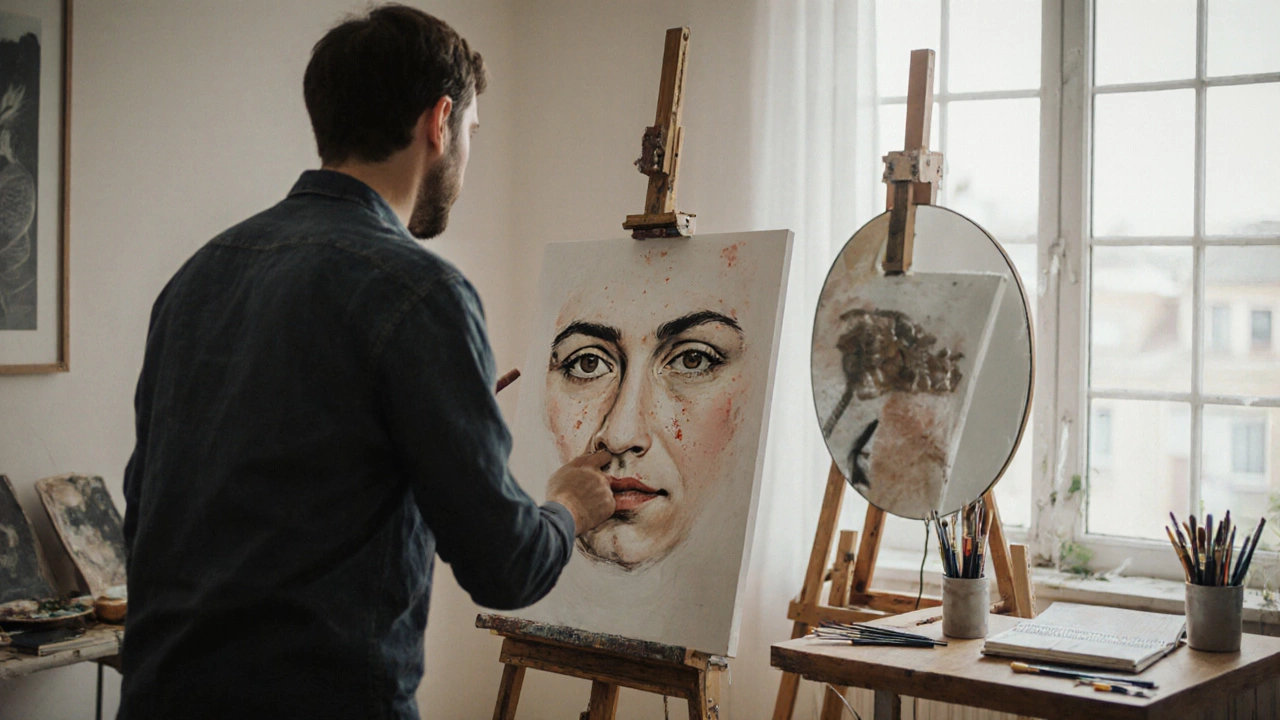
Accept Imperfection
No portrait is ever perfect. Even the greatest artists left subtle quirks-the slight tilt of a head, the uneven smile, the shadow that doesn’t quite match. That’s what makes it human. Your first portrait won’t look like a photograph. And that’s okay. It should look like a painting. It should show your hand, your choices, your feeling. Painting portraits is about connection. Not replication. You’re not trying to copy a face. You’re trying to capture a presence.Practice with Short Sessions
Don’t try to finish a portrait in one day. Set a timer for 45 minutes. Paint just the eyes and nose. Then stop. Come back tomorrow. Do the mouth and jaw. Then the hair. Then the background. Short, focused sessions build confidence. You learn what works without burning out. You start to recognize patterns-how light falls on a cheek, how shadows gather under the chin. Keep a sketchbook. Doodle faces from photos, magazines, people on the train. Don’t aim for finished work. Just observe. The more you look, the more your hand learns.What to Avoid
- Don’t use black for shadows. It flattens the face. Use dark blues, purples, or browns instead.
- Don’t blend everything with your brush. Let some edges be sharp. Others soft. Real skin doesn’t have smooth gradients everywhere.
- Don’t paint the whole face in one color. Skin has warmth, coolness, redness, yellowness-all in the same spot.
- Don’t copy photos exactly. Photos flatten depth. Your job is to restore it.
Portrait painting isn’t about talent. It’s about attention. The more you look, the more you see. The more you see, the more you can paint.
Do I need to be good at drawing to paint a portrait?
No. Drawing skills help, but they’re not required. You can paint a portrait using shapes, values, and color alone. Many artists start by blocking in forms with paint directly-no pencil sketch needed. Focus on seeing the big shapes and how light moves across them. Your hand will catch up with your eye.
Should I paint from photos or live models?
Start with photos. They’re easier to control. You can pause, zoom in, and work at your own pace. But don’t stay there. Once you’re comfortable, find a friend willing to sit for 20 minutes. Painting from life teaches you how light changes, how skin breathes, how expressions shift. Photos are flat. Life is dynamic.
What’s the best paint for beginners?
Acrylics are the easiest to start with. They dry fast, clean up with water, and let you layer quickly. Oils give richer color and more blending time, but they take days to dry and need solvents. Watercolors are beautiful but unforgiving for portraits-hard to correct mistakes. Stick with acrylics until you’re confident.
How long does it take to paint a portrait?
It depends. A simple head-and-shoulders portrait in acrylics can take 3-5 sessions of 45 minutes each. A detailed oil portrait might take weeks. The goal isn’t speed-it’s learning. Each session adds something: a shadow, a highlight, a shift in expression. Progress isn’t linear. But it’s real.
Why does my portrait look flat?
Flatness usually comes from not using enough contrast. Check your darkest darks and your lightest lights. Are they truly different? If your shadows are just a darker version of skin tone, you’re missing depth. Add a cool blue-purple shadow under the jaw. Brighten the highlight on the cheek with pure white mixed with a hint of yellow. That contrast creates dimension.
Start small. Start simple. Start now. Your first portrait won’t be perfect-but it will be yours. And that’s where the real art begins.